

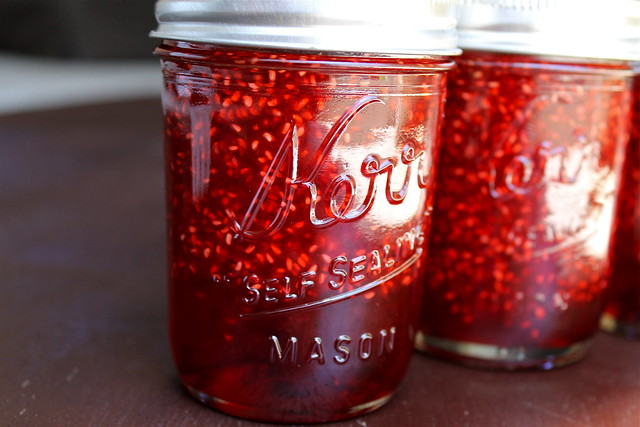
I mentioned on Friday that I spent much of the day engaged in Domestic Goddess type of chores. One of those accomplishments was making and canning some raspberry jam. (Does anyone know why it's called "canning"? It goes in jars). Since I had a whole flat of raspberries, I figured it was the time. I've made it before, and it's always well-reviewed; I've given mini (4oz) jars as party favors and Christmas presents. This year I made all half-pint (8oz) size jars, and I'm planning on gifting most of them.
I've had good results by using Well Preserved, and the author includes lots of additional information, tips, and directions that are especially helpful if you're terrified of giving your friends botulism. Ball, Canning Across America, and Food In Jars are great online resources (there are tons). If you're new to canning, this is a great recipe to start with. There are only three ingredients, and in general, jam is pretty forgiving.

Need cute labels? Make your own, or try one of the solutions I've rounded up here or on Pinterest.

Raspberry Jam - vegan, gluten free, and free of just about everything else
adapted, hardly at all, from Well Preserved
I doubled the recipe and it yielded 7 half-pint(8oz) jars. Depending on how much you cook it down, you should get 3-4 half-pint jars using the measurements below. You can also use this same basic recipe for blackberry jam. Here is a great article specifically about jam setting. Besides putting it on toast, jam makes a great cake filling.
4 C (950mL) raspberries (3ish of those 6 oz clamshells from the grocery store)
3 C (720mL) sugar
1/4 C (60 mL) lemon juice
In a large pot, gently mash raspberries and sugar together. Let stand for 1 hour.
In the meantime, prepare your preserving jars, lids, tools, etc.
Bring the raspberries+sugar to a boil over medium-high heat; stir in lemon juice. Boil rapidly, stirring often, for 15-20 minutes, or until it starts to thicken. You can test for set if you'd like, or aim for a temperature of 220F.
You have a choice here; you can either skim off the foam while the jam is boiling or you can wait until it's ready, remove it from the heat, and skim then. I like to do it while the jam is boiling, but I don't know that one way is better than the other.
So, once foam is removed, pour jam into hot, sterilized jars, leaving a 1/4-inch (6mm) head space. Wipe the rims clean. Seal according to manufacturer's directions. Process the jars in a boiling water bath for 10 minutes.
Hooray for jam! Raspberry is almost my favorite--right after apricot. Of course, the problem is getting the raspberries home to jam without eating them all out of hand. :)
ReplyDeletethat's true. that's why you gotta buy in bulk :) Have you made apricot jam?
DeleteNot only are raspberries delicious to eat, they make great photos! You've got some beauties here.
ReplyDeletethanks, friend :)
Delete