Showing posts with label birthday. Show all posts

Tuesday, October 7, 2014

Pumpkin Cinnamon Rolls with Maple Glaze – vegan

Pumpkin Cinnamon Rolls with Maple Glaze | http://www.katesshortandsweets.com

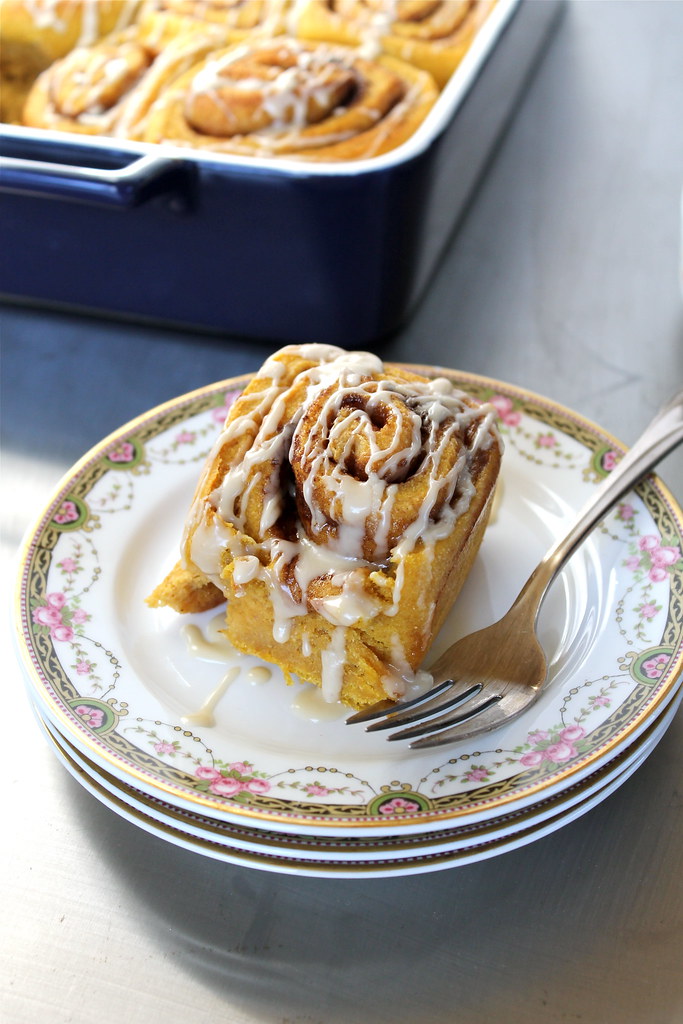
hello, friends! Today I give you yummy nummy (now a word, btw) pumpkin cinnamon rolls with...drumroll please....maple glaze. I've been teasing you since last week, so it seems only fair to share the love. And love it really is.
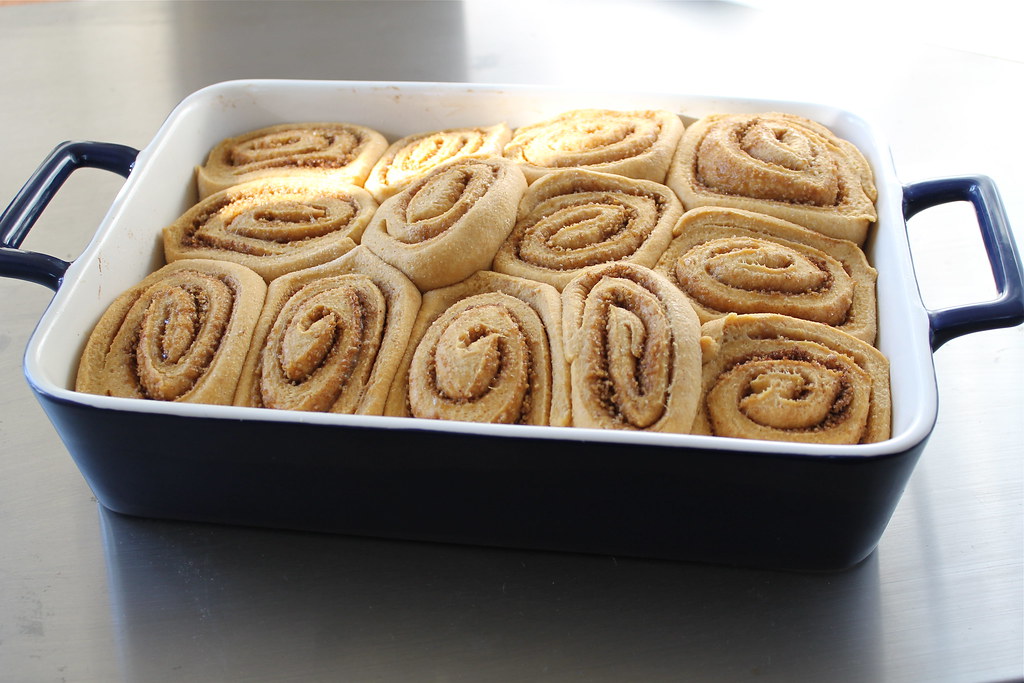
risen but unbaked pumpkin cinnamon rolls | http://www.katesshortandsweets.com

I'm one of those people who feed people as an expression of love, as a welcome-to-my-home, as an are-you-ok, as an I-hope-you-feel-better-how-can-I-help, as a hello-nice-to-meet-you-I-hope-you-like-me kind of a thing. I hope other people see it as such, but even if they don't, a) I hope it makes them feel better, even if they don't know why and b) it makes me feel better. And in a weird kind of way, sometimes presenting a dish that's more complicated or time consuming than usual makes me feel like I'm giving them more and showing I care even more. Do you other cooks and bakers out there feel the same way, or is that a Kate Special?
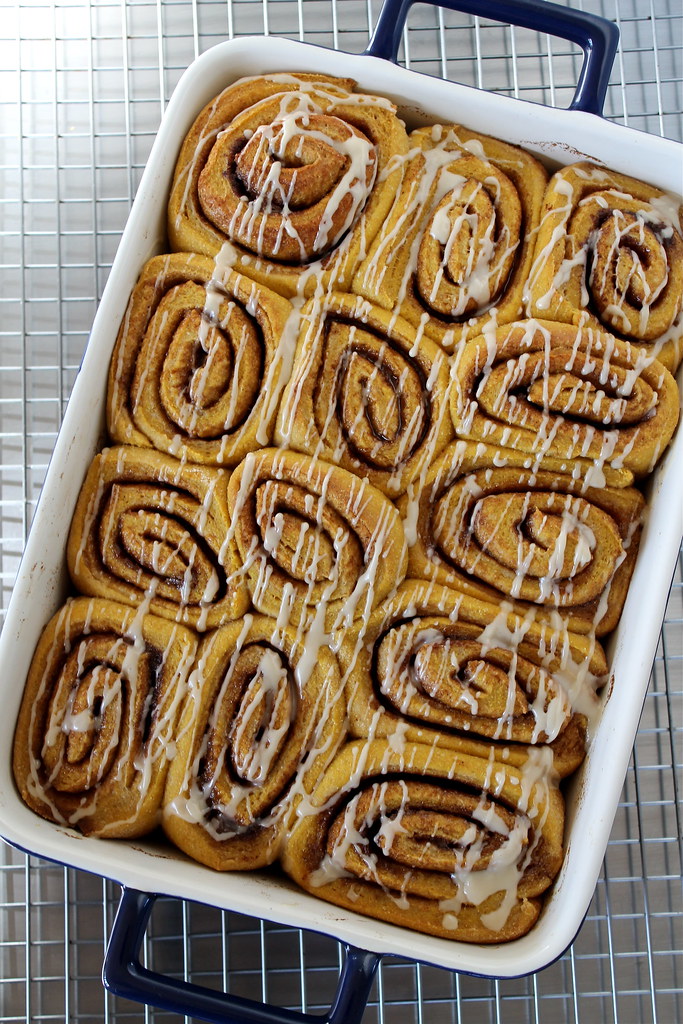
Pumpkin Cinnamon Rolls with Maple Glaze, vegan | http://www.katesshortandsweets.com

Anyway, these pumpkin cinnamon rolls fall into that category. I'm not going to make these all the time, but when I do make them, know that you're special. or that I want to impress you. or both. Because they are impressive (ask my coworkers) and they are delicious (ask my mouth) and they aren't as hard as they look (yay). The perfect trifecta.
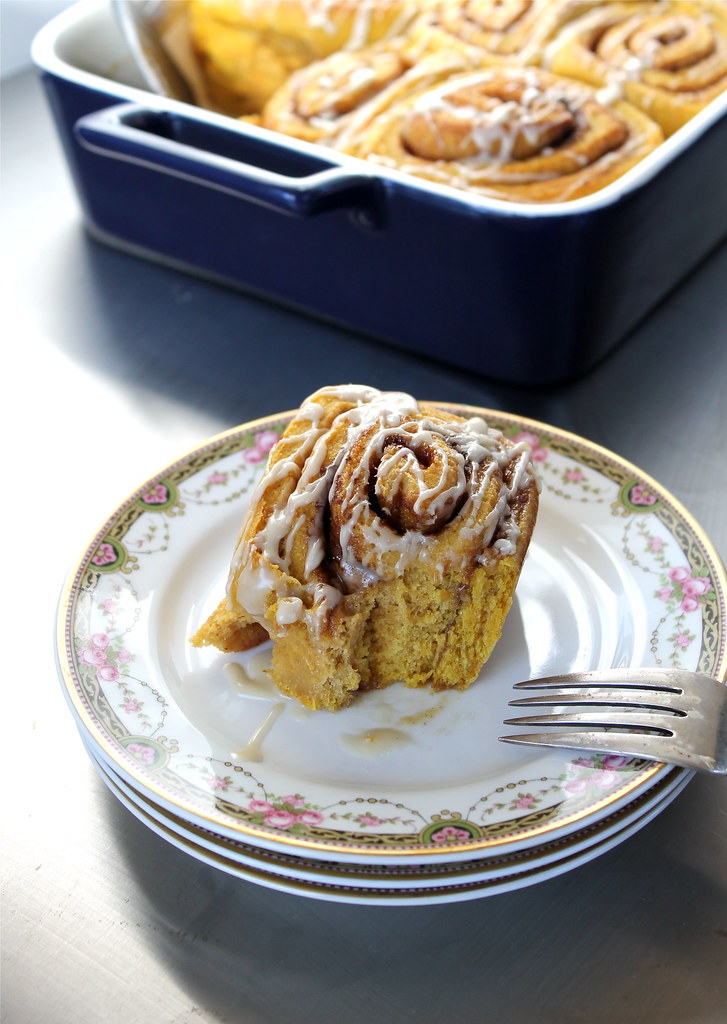
Pumpkin Cinnamon Rolls with Maple Glaze – vegan | http://www.katesshortandsweets.com

These buns are full of sweet, gooey, pumpkin, cinnamony goodness. As with my other go-to brunch recipe, you can prepare them at night, go get some sleep, and bake them fresh in the morning. Side note: the overnight route is really, really, really the way to go if you are hosting breakfast/brunch. It's a win-win- you don't have wake up stupid early, and you and your guests get fresh, out of the oven yummies. Also, a more relaxed host(ess) makes for a better party.
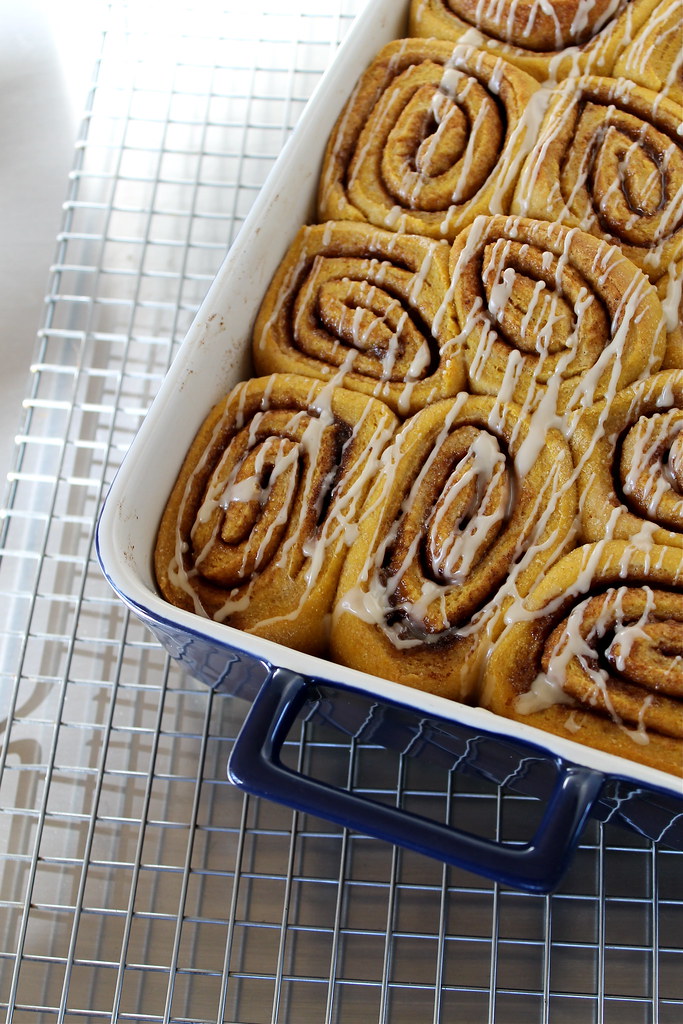
vegan Pumpkin Cinnamon Rolls with Maple Glaze | http://www.katesshortandsweets.com

In an effort to help make clear possibly hard-to-understand directions, for the first time I enlisted Mr Official Taster's help in creating a short video for you. I wanted to give the time-lapse feature on my iPhone a try. There is no sound, and if you want to make it larger, click on the button on the bottom right that has the four arrows to make it full screen. Update: the video doesn't seem to be showing up on mobile devices, and I don't know why. Hopefully I can figure it out. Until then, here's a link to the video: https://flic.kr/p/pgN3GL


For the most part, I'm pretty happy with it. I know the lighting is not great, and next time he'll stand on a stool behind me for a better birds-eye perspective. But I'm really curious about your reaction. Is is helpful? Do you like it? Is it long enough? too long? Unnecessary? Speak your mind, please!

Also, please make these for someone you love. Neither of you will regret it!

Not into pumpkin? Try my regular cinnamon rolls- they're yummy too.


Pumpkin Cinnamon Rolls with Maple Glaze – vegan

Though the written recipe is long, it is not particularly difficult, and the end results are well worth it. I chose to use coconut oil in place of vegan butter throughout this recipe, but either works, and I can imagine that Earth Balance vegan butter would impart a nice buttery flavor. Note that vegan butter is salted, so if you go that route, be sure to use the smaller salt measurement.

If you need this recipe to be corn free, powdered (AKA confectioners’) sugar is not your friend since it's sugar+cornstarch. I can think of three options here. A) Make the glaze, but don’t drizzle over the top. Allow everyone you’re serving to choose whether to add it to his or her portion. B) Skip the glaze and just top with maple syrup. C) Make your own corn-free powdered sugar by whirring an equal volume of regular or superfine white sugar in a food processor. Basically, you grind it down into finer grains. It’s not exactly the same as powdered sugar, but it’s a pretty good substitute.

Dough
1 C pumpkin puree, canned or fresh
1 C nondairy milk
½ C plus 1 Tbsp sugar, divided
½ C vegan butter or coconut oil
½ -1 tsp salt (see note)
1 tsp vanilla
¼ lukewarm water (about 110F)
2 ¼ tsp (or 1 packet) active dry yeast
5 C all-purpose flour (I used white whole wheat), divided, plus more for rolling

Filling
¾ C brown sugar (I used Sucanat)
2 Tbsp sugar
2 tsp ground cinnamon
½ tsp nutmeg
4 Tbsp vegan butter or coconut oil, melted
1 C raisins (optional)

Glaze (see note)
½ C powdered sugar
3 Tbsp maple syrup
Up to a few tablespoons water, as needed

Make the dough
In a medium saucepan, whisk the pumpkin, nondairy milk, ½ cup sugar, coconut oil or butter, and salt over low heat until combined. Remove from heat and add vanilla. Let cool until lukewarm, about 110 degrees F.

While the pumpkin mixture is cooling, place the warm water, remaining 1 tablespoon sugar, and yeast in a 1-cup glass measuring cup. Stir for a second or two and set aside for about 10 minutes. The yeast will become foamy, double in size, and reach the ¾-cup line. If it does not do so, then either your yeast was dead or the water was too hot (and killed the yeast); make another yeast mixture before proceeding.

In a stand mixer fitted with a paddle attachment, combine the pumpkin mixture and the yeast mixture. Beat at a medium speed for about 1 minute. Add 2 ½ cups flour, and stir on low until incorporated. Add the remaining 2 ½ cups flour and repeat. The dough will be somewhat sticky. Exchange the paddle attachment for the dough hook and knead on a medium speed for about 2 minutes.

To save yourself from washing an extra bowl, gather the dough ball and balance on one hand. With the other, spray the mixing bowl with nonstick spray. Return the dough to the bowl, and then turn it over so the entire ball is coated with oil. This will prevent the dough from sticking to the bowl as it rises. Cover with a kitchen towel or shower cap, place in a warm spot, and let sit until it has doubled in size (about 1 ½ hours, less if it’s a warm day).

Remove cover and punch down the dough so that it deflates. Take the dough out and put it on a lightly floured surface. Recover with the kitchen towel and let rest for about 10 minutes.

Make the filling & assemble the rolls
While the dough is resting, lightly grease a 9- x 13-inch baking pan. Combine brown sugar or Sucanat, sugar, cinnamon, and nutmeg in a small bowl and set aside.

Roll the dough out on a lightly floured surface. Aim for a 20- x 13-inch rectangle (it doesn’t need to be exact). Brush or spread the melted oil over the entire surface of the dough. Sprinkle the sugar mixture evenly across the surface. If you like raisins in your cinnamon rolls, sprinkle them evenly over the surface at this point.

With the long edge of the dough rectangle close to you, roll the dough up away from you, so you are creating an approximately 20-inch long log. (see video above) With the seam side down, use a sharp knife to cut the log in half. Then cut each roll into 6 equal pieces (observant readers will notice I ended up with 13 pieces. It is a-ok). Ideally, you will have 12 cinnamon rolls. Place the rolls, swirled side up, into the prepared pan, in 4 rows with 3 rolls in each row. You don’t need to smoosh them together – the next rise will take care of that.

If you’re baking them right away, cover pan with a dry kitchen towel, place in a warm spot, and allow to rise a second time for about an hour. If, however, you are assembling them at night and plan to bake them in the morning, cover the pan tightly with plastic wrap and place the fridge overnight. Remove them in the morning at about the same time you start to preheat your oven.

All together now - once the cinnamon rolls have risen, preheat your oven to 375F. Bake, uncovered, for 20-25 minutes. When fully cooked, they will be lightly brown on top, and a toothpick or a knife inserted in the center will come out free of dough. (Do check. Don’t be as impatient as I was the first time). Let the rolls cool for about 10 minutes before glazing.

Make the glaze
In a small bowl, stir together the sugar and maple syrup. If it’s too thick, add water, a little bit at a time, until smooth and drizzle-able.

Drizzle glaze over the rolls. Proceed to stuff the warm pumpkin cinnamon gooey goodness into your mouth. Alternatively, use a fork and a plate for maximum politeness.

Wednesday, November 13, 2013

Red Wine Chocolate Cake with Coconut Whipped Cream - dairy free/vegan/gluten free

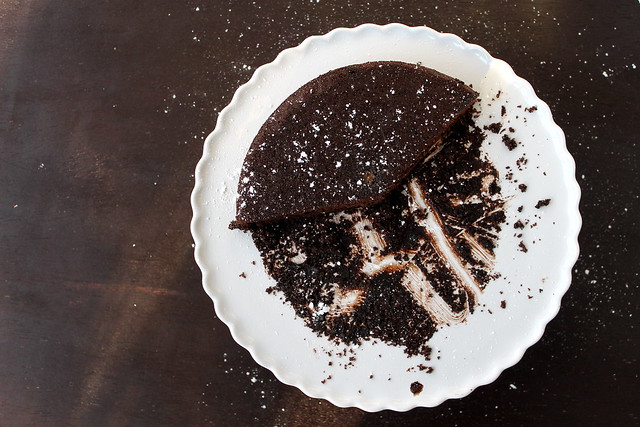
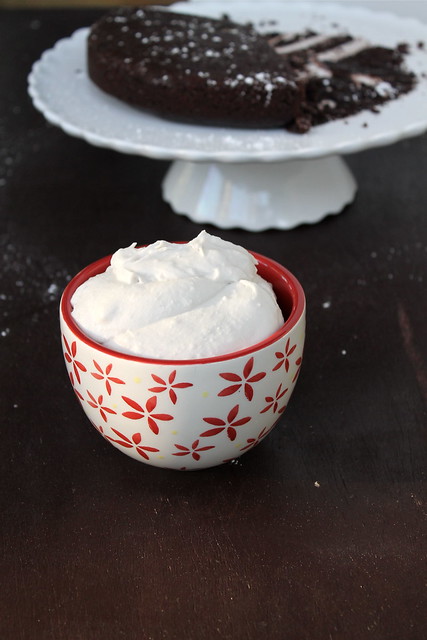
Red Wine Chocolate Cake (dairy free) with Coconut Whipped Cream (vegan & gluten free)

I made my mom bread, but I made my dad cake.

I knew I wanted to make my dad a birthday cake while he was here, but I didn't want it to be a tower of sugar and frosting (I know, I know. That would have been awesome). I've had a few recipes saved for chocolate cakes that use wine to add flavor and color, so I looked through what I had, picked the best of the lot, adapted it a bit, and made it. But you pretty much need frosting on a birthday cake or it's not a birthday cake. I wanted something light and not chocolate, so I went with a vanilla whipped cream made from coconut milk. I had good luck in the past with chocolate frosting using coconut milk, so I was eager to try it's vanilla cousin.

Red Wine Chocolate Cake (dairy free)

Friday, February 8, 2013

Chocolate Cupcakes with Chocolate Buttercream Frosting - vegan

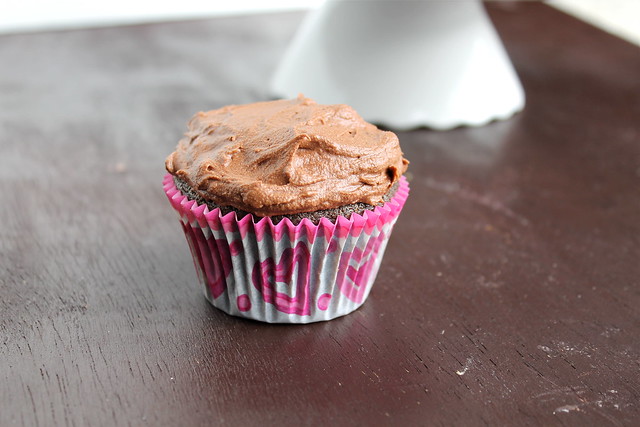
Chocolate Cupcakes with Chocolate Buttercream Frosting

Have you been looking for your go-to, un-fussy, everyday chocolate cake (or cupcake!) recipe? Look no further, folks, because I've got it for you. I first came across this eggless chocolate cake sometime last fall, filed it away pinned it, and rediscovered it recently. The first time I made it was disappointing, not only because I forgot the baking soda, but because it wasn't terribly chocolatey. I did some thinking, some chocolate craving, made some bread, and tried again. The results were fantastic.

Friday, January 18, 2013

Happy Birthday Card Round Up - free printables


Guys, it's my birthday weekend! I'm psyched to eat cupcakes and have two days off from work to spend with Mr Official Taster and the puppies. In case you need a card for someone, here are a few cute ones I found via Pinterest (where else?).

via

via

via

I hope your weekend has some fun cupcakes!

Monday, July 9, 2012

Homemade Oreos - vegan, or not

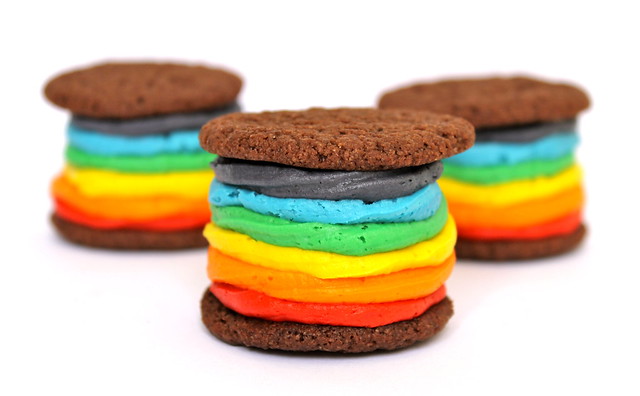
Rainbow Oreos, vegan or not

You may have heard that there was a bit of a hubbub last month regarding a rainbow Oreo illustration that Oreo posted on their Facebook page in support of Pride. If you missed it, here is their original post, and here and here are some articles. Stephen Colbert even got in on the action.

I've talked a bit here and here about my thoughts, but, honestly, I mostly a) wondered how do people have enough free time+energy in their lives to make a hubbub. over a fake oreo. and b) thought, hmmm that looks delicious.

Tuesday, March 13, 2012

Chocolate Stout Cupcakes with Chocolate & Vanilla Frosting - dairy free


Even though we lost an hour of sleep Saturday night, I am so glad the clocks are pushed back. It's still (somewhat) light at 7pm! To celebrate the extra daylight, Mr Official Taster and I put in some thought and heavy lifting and created a little garden on our balcony over the weekend (more on that here). Unfortunately, our ten day forecast looks like it did when we lived in Seattle. But soon, I hope, it will be both warm and dry, and we can have dinner outside and enjoy our baby garden. Eventually, we might even be able to eat from our garden. Here's hoping.


As soon as I came across this recipe, I knew I had to try it, and Mr OT welcomes any excuse to finish off a bottle of beer. Since this recipe only uses a little, I waited until the weekend so he would be around to drink chivalrously help. As wonderful as chocolate cakes are, I didn't have a party to bring one to, and cupcakes are, well, easier and cuter, so they won. But if you have something or someone to celebrate, go forth and make the cake. It will be both impressive and delicious.


Chocolate Stout Cupcakes with Chocolate & Vanilla Frosting - dairy free
inspired by Bon Appetit

Especially with the chocolate frosting, these cupcakes are for serious chocolate lovers. The frosting is super intense, and I think I actually like the cupcakes with vanilla frosting better. Using milk chocolate rather than dark would make it sweeter.

The recipe works with the same quantities of real salted butter and milk. Instead of cupcakes, you can make a cake! Line two 9-inch round cake pans with parchment paper and then grease and flour over the parchment. Baking time is approximately 30 minutes, or until a toothpick inserted in the center comes out clean. Double the frosting recipe.

Cupcakes (yields 24)
I used Rogue Brewery's Chocolate Stout, but several other breweries also make versions. Guinness is probably the next best thing. 

3 large eggs, separated
2 1/4 C all purpose flour
2 tsp baking powder
1/2 tsp baking soda
1/2 tsp salt
3 ounces unsweetened chocolate, chopped
14 Tbsp (1 3/4 sticks) vegan butter, room temperature
1 1/4 C plus 3 Tbsp sugar
3/4 C chocolate stout, regular stout, or porter
2/3 C freshly brewed strong coffee or espresso

Preheat oven to 350F and line muffin tin with cupcake papers. 

Separate the eggs- the whites should go in a medium bowl and the yolks can just go into a small bowl or measuring cup. Separate them when you first take them out of the fridge, and they can come to room temperature while you prepare the rest of the recipe.

In a small bowl, whisk together flour, baking powder, baking soda, and salt. Set aside.

Place chopped chocolate in small metal or glass bowl. Set bowl over saucepan of barely simmering water and stir until chocolate is melted and smooth. Remove bowl from over water and set aside.

Meanwhile, cream butter and 1 1/4 C sugar in a large bowl with an electric mixer until fluffy and pale. Add egg yolks, one at a time, and beat well after each addition. Add lukewarm chocolate and combine. Then add stout and coffee. Beat in flour mixture in two additions until just incorporated.

With clean, dry beaters, beat egg whites and remaining 3 Tbsp sugar in a medium bowl until stiff but not dry (I interpreted that as stiff and still shiny) - approximately 8 minutes. Fold egg whites into chocolate batter in three parts.

Spoon into cupcake papers. Fill each mold 2/3 full. Bake for 18-20 minutes, or until the cupcake tops spring back after pressing lightly with your fingertip (or a toothpick inserted into the center comes out clean). Allow to cool in pan for about 10 minutes, then turn out and allow to cool completely on a wire rack. 


Chocolate Frosting (covers about 12 cupcakes)
1/2 pound bittersweet or dark chocolate (54% to 60% cacao), chopped
1 C nondairy milk (I used almond)
1-2 tsp vanilla

Combine chocolate, milk, and vanilla in a glass or metal bowl (you can reuse the one from the batter. one less to wash!) and set bowl over saucepan of barely simmering water and stir until melted and smooth. Chill chocolate frosting until slightly thickened and spreadable, stirring occasionally, about 2 hours. If you're impatient like me, place frosting in freezer until thickened and spreadable, stirring occasionally, about 30 minutes. Spread frosting over about half the cupcakes. 

*This is too thick to pipe, but if you want to be able to make those pretty piped tops, try adding some butter at the beginning so it's more of a buttercream. Maybe 1/4-1/2 stick??*


Vanilla Frosting (covers about 12 cupcakes)
1/4 C (1/2 stick) vegan butter at room temperature
1 C (~100g) confectioners' sugar 
1 tsp vanilla extract
non dairy milk (I used almond)

Cream the butter and mix in vanilla. Add sugar, a little at a time, beating well after each addition. If frosting is too stiff, add milk 1 tsp at a time and beat until well combined. Spread or pipe frosting over the remaining cupcakes.

Tuesday, February 21, 2012

DIY - How to Make a Wedding or Birthday Card Book


or, How to Corral that Pile of Cards You Just Can't Throw Away.

Mr. Official Taster and I got married last year, and one of the perks of doing so is that your friends and family give you well-wishes and love in the form of cards (newsflash: sometimes they even come attached to a present). I wanted to keep these cards, and now that they have survived a couple moves, it seemed like a good time to do something with them more exciting that keeping them in a pile on top of the card catalog. Clearly, this concept isn't limited to wedding cards - birthdays, graduations, or any other special event might deserve a special book.

First, decide what you want to use as your book cover. I chose fabric, because we have a history of moving and because I thought it would be more durable than paper. BUT. Pretty paper also works, and might be somewhat easier to work with. Try here for some good paper instructions. If you're using fabric, be sure it's washed and dry, and iron it so it's nice and smooth.


Now, find your biggest card. In my case, the widest one and the tallest one were different, so I pulled out both. Using scrap paper, measure out a rectangle that's about 1/4" bigger on each side than your biggest card. So if that card is 5"x7", your template will be 5.5"x7.5". This is the size your book cover will be. 


Next, you need to trace that template onto whatever sort of cardboard you are using. We have had a lot of boxes hanging around lately, so I used part of one. You could also use foamcore, or the cardboard that comes on the back of note pads or legal pads. Cut out your cardboard rectangles - these are the book covers.


Lay out your fabric of choice, and decide how much you'd like to have to wrap around the cardboard. I probably could have used slightly less, but it doesn't really matter too much. At this point, you should also consider the pattern of your fabric and how you'd like that oriented, vertically or horizontally. For example, my fabric is striped, so I could choose to have the stripes going up and down, side to side, or even diagonally on my book. I went with vertically.


Now, you're going to cover the cardboard with your fabric. Make sure the fabric is face down on your work surface, and center the cardboard on top of it. I used Liquid Nails to adhere the fabric to the cardboard, and it worked well. It's also what I happened to have on hand, so there are certainly other options out there. The downside of using Liquid Nails was the looong dry time, so something like hot glue would be way faster. Start by glueing the long sides. (this process is a lot like wrapping a present, if that helps) Then I actually used some packing tape as an additional hold-down, which you can see better in some photos a little further down.


Just like wrapping a present, once you have smoothly secured the long sides, fold in the edges on the short side.


You want to make these folds as tight and flat as you can. Here's another angle to help you visualize all this.


Put some glue in the middle of the short side, and then fold the fabric up and over. Again, keeping it as tight and flat as possible. Repeat with the last side, and then I taped down the edges of the fabric as part of my flattening. 


Allow your glue to dry completely, according to the package instructions. I left mine under some heavy cookbooks for a while to help things stay flat. Depending on the type of glue you use, this step may or may not be necessary.


Next up: making the pockets. I looked at the inside of the book cover (where all the folded fabric is) and determined how much of it I should cover with the paper pockets. In my case, the original cover template was a pretty good size, since fabric had increased the overall dimensions of the cardboard. That also meant I knew the cards would all fit. So I traced what would become the back of the pocket on a piece of scrap paper (the one on the left, below). I measured to between 1/2 and 1/3 of the way up from the bottom to determine how high I wanted the pocket to come. (There wasn't enough room on the original piece, so I ended up making the pocket on a separate piece of paper and then taping them together.) Make sure the total length of the back+the pocket is not longer than the piece of paper you are using to create the pocket. I used a 12x12 piece of cardstock, so my total length was 12 inches. Finally, use your ruler to add on tabs to the back of the pocket. These will be what connect the back and the front. If you angle the ends, the finished product will look neater.


Cut out your template and double check that your largest card(s) will fit inside the pocket.


Trace your template onto your pocket paper. As I mentioned, I used a 12x12 sheet of cardstock. They are available in about a million colors and are in the scrapbooking section of craft stores. I bought three sheets- one each for the front and back pockets, and one extra in case I totally screwed up.


Once you've cut out your pocket, you'll need to decide how to glue it all together. I used these adhesive dots rather than glue, and I'm glad I did. They were easy, no-mess, and they don't have a dry time. There are a few different brands and sizes available.


Scoring the cardstock along the fold lines before you actually fold it will make those folds both easier and crisper. I don't have an official scorer tool, but a table knife and a ruler or other straight edge work quite well.


Place your adhesive on the "wings" and press the front of the pocket down firmly. Repeat those steps for the second pocket. If you are using glue, pause here until the glue is completely dry.


Almost done! I used thick ribbon (1.5" wide) to connect the front and back covers. Place your two covers side by side and lay some ribbon down. Don't attach it yet!


Put all your cards in the pockets. Place the pockets on top of each other. Then, to see how big to make your book, place the pockets on top of the laid out ribbon. Figure out how much ribbon you need to reach around the books, and how far that means the covers need to be apart.


Cut two pieces of ribbon to that length. Lay out your book to make sure it all works before glueing things down.


Firmly attach the ribbon to both covers of your book. Then, attach each pocket to the cover (yes, on top of the ribbon).


Technically, you're done! You've made a book! I, however, wanted to make my a little more secure, so I opted to basically make a ribbon belt for my book. I used the same ribbon I used to bind my book and D Rings from the sewing section of the craft store. Make sure the width of your ribbon matches the width of the D Rings you choose.


Measure out and cut enough ribbon to wrap around your book. Sew two D Rings into one end of your ribbon. I tucked the very end under to make it look slightly more finished.


Finally, wrap the ribbon belt around the book and tie off.


Now you really are done!


I'm pretty pleased with how it turned out. If I was fancy, I could embellish the covers with our initials, or wedding date, or something, but, for now, I'm happy with it as-is. 


Wednesday, January 25, 2012

Classic White Birthday Cake & Mocha Frosting - dairy free & vegan


 As you may know, my birthday was Friday. (hey. take the survey.) Friday itself wasn't super exciting (though I did have a lovely dinner out) since I spent the day looking at apartments. I visited six(!) as part of my vetting process. My reward was watching tv and opening presents (with help). Now that was good times. My big birthday present and surprise was a visit from two of my favorite people, coordinated by Mr Official Taster. E and W flew down from Seattle to spend the weekend with me! Yes, ladies and gentlemen, he definitely deserves a round of applause for that one.  awesomesauce.


We had a great time. (and Birthday Champagne doesn't hurt) Predictably, food occupied a lot of our time and energy, but we four also went to check out the best of the apartments I looked at on Friday. Everyone ok'ed it, and Mr OT and I decided it was to be our new home. Phew. I am so glad the search is over and that we have a permanent place. 


The new kitchen is insanely tiny - definitely the smallest I've ever had - but that seems to be consistent in this area. Apparently apartment builders have learned that renters prefer their square footage in their bedrooms, living rooms, and even bathrooms. Or do they just assume that people don't really cook? I know that we're told that people cook less than they used to, and I'm sure that's true, but it would be pretty sad if some people never cooked. For my new kitchen, creative organization will be required.


Anyway, back to birthdays. This so-called furnished kitchen is less than actually really furnished, so I aimed for a simple recipe with as few ingredients, pans, and messy steps as possible. 1-2-3-4 Cake is an old classic, and the name comes from the ingredients: 1 cup milk, 2 cups sugar, 3 cups flour, 4 eggs. The finished product, however, was decadent, and the one I made this weekend was not for the faint of heart. 3 layers of cake, raspberry jam, and mocha buttercream. It was a happy birthday indeed.


Classic 1-2-3-4 Cake - dairy free
makes 3 9-inch layers. I halved the recipe and made 3 6-inch layers. You can also make cupcakes (24?)
1 C (2 sticks) vegan butter, at room temperature
2 C sugar
4 eggs
3 C sifted self-rising flour*
1 C non-dairy milk of choice (I used almond)
1 tsp vanilla

Preheat oven 350°F. Grease your pans, place a round of parchment paper in the bottom of each, and grease the paper.

With an electric mixer, cream butter until fluffy in a large bowl. Add sugar and continue to beat for another 5-7 minutes. Add eggs one at a time and beat well after each one. Alternately add the flour and milk to the creamed mixture beginning and ending with flour. Add vanilla and mix in until just combined. Divide batter evenly among prepared pans. Level batter with a spatula or by dropping the pans onto the counter from a height of 2-3 inches a few times. Bake for 25-30 minutes, or until a toothpick or tester inserted into the center comes out clean. If you're making cupcakes, start testing at 15 minutes. Allow to cool for 5-10 minutes in the pan before turning out onto a cooling rack and allow to cool completely.

* Self-rising flour has both salt and baking powder in it, but you can make your own at home with the following formula: 1 cup self-rising flour = 1 cup all-purpose flour, minus 2 teaspoons + 1 1/2 teaspoons baking powder + 1/2 teaspoon salt.

Mocha Frosting - Vegan
I made one full batch for my 6-inch cake and had some left over, but I think if I had used frosting between the layers instead of raspberry jam, the amount would have been perfect.

1 stick vegan butter at room temperature
3 C confectioners sugar
1/3 C cocoa
1/4 C strongly brewed coffee or espresso at room temperature (ish. NOT an exact measurement)

Cream the butter and then add the sugar and cocoa a little bit at a time. Add the coffee slowly, until you've reached the desired consistency. It should take 10 minutes or so to combine everything and beat it enough to give it some volume.

Assemble the Layers!
Stack the layers in whatever order you'd like, and frost just like you would any other cake. I used raspberry jam between each layer, rather than frosting, and it was decadent and delicious. I highly recommend it! This and this are good tutorials if you need instructions or a refresher.

Related Posts Plugin for WordPress, Blogger...